|
|
|
Prospective Layers
|
|
|
|
Click on these small images to view their
galleries of detail and full-screen rendition.
|
|
Side View
|
|
||
|
|
|
The birdseye to the left was my 2nd
attempt to develop a workable plan from which I can then make a list of
materials. The clips to the right and below
are my 3rd, drawn from and improving upon the birdseye view, as
they also provide an alternative viewpoint for late night thought. |
|
|
|
|
The images below do not have a larger view available |
at this time. |
|
|
|
|
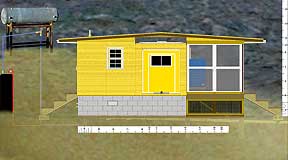
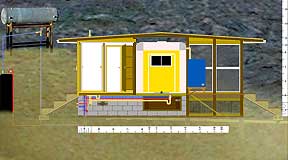
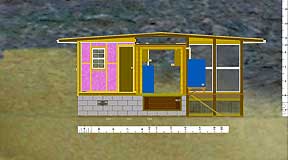
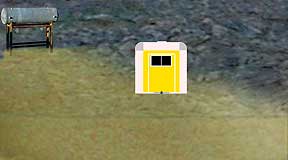
1. The Prospective Side View, 2002. |
|
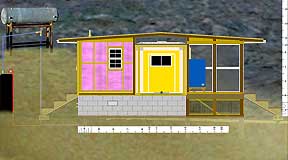
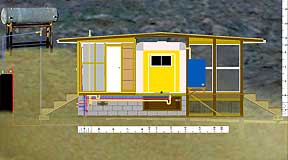
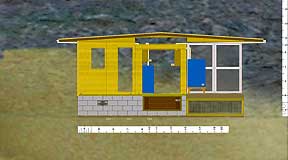
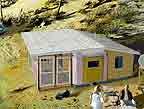
2. Behind the sheathing |
Modular construction allows for eventual move to higher arroyo. |
|
|
|
Addition on the left; porch on the right; trailer in the middle,23' X 21' +/-. 3' foundation area for storage; wire meshed area under deck for cat. Wide roofsoffit for shade.
Open area over trailer blows heat away. |
|
Insulated framed
addition (forgot to add 45°
bracing). 7 deck posts on steel
brackets in concrete footings; more bolt to deck joists. 3 attach to center found. sill. All hold
roof in occasional high winds. |
|
|
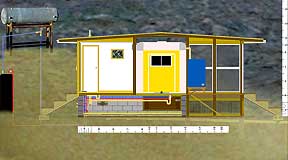
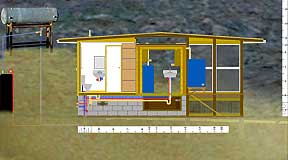
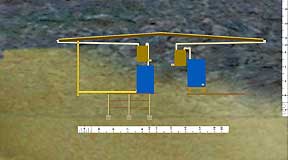
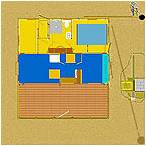
3. My office; my space, &
crawlspace |
|
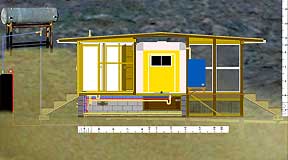
4. Peeling inward, layer by layer |
|
|
|
|
Inner office
wall, 4 ft in (with picture). Crawlspace has
poly, framing & ply floor. (Forgot to add central block column). Rear gate is
for deck screen, etc., storage when away in summer. |
|
Previous
image:floor & wall vents allow
air circulation up & out
(installed in all rooms). Here:inner office wall framing with hall
behind. Trap doors (not visible) lift to hall
& bedroom. |
|
|
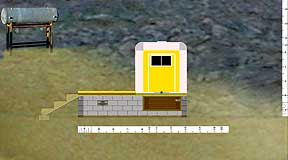
5. The foyer |
|
6. Peeling to the bath (shower
really) |
|
|
|
|
Hall, left to
right: exterior door to
steps, trap door to crawlspace, center door to
segregate office area (I smoke), door to bath, shelving unit, entry to trailer. |
|
Hall framing with
plumbing vent to roof - shower stall behind. Next image:plumbing fixtures & shelving in bath,
sink in trailer kitchen. |
|
|
7. Plumbing system & Bath |
|
8. Bath/Bedroom Framing |
|
|
|
|
Two pipes from
water tank filled by truck – 1 below grade to fixtures inside; other to black
tank heated by sun, then to sinks & shower. Drain runs out rear to
distant septic hole. |
|
Bath framing
& shelving unit open to bedroom |
|
|
9. The Bedroom |
|
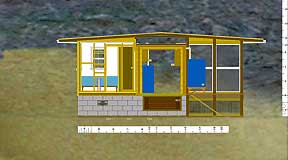
10. Peeling to the exterior. |
|
|
|
|
Exterior door
opens to steps. Trap door &
vents in floor. No wall to right extends
bedroom to include original of trailer with its wall cut out. |
|
Insulated framed
exterior wall (forgot 45°
bracing). Ultimately will
add solar panels on roof to charge battery bank to provide clean power.
Current estimate about $10K, so must wait. |
|
|
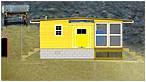
11. Rear exterior sheathing |
|
12. Rain water collection |
|
|
|
|
Exterior
sheathing over sill over rear foundation wall. Rear deck screens
over deck over joists over rear framed wire mesh. |
|
Mesh covered roof
gutters drain to filtered sediment barrels which overflow to larger barrels
sitting on rear steps & deck. Taps permit filling coffee pot, etc.;also for flushing. |
|
|
13. Addition, phase 1 |
|
14. Upon arrival, 11/01 |
|
|
|
|
Previous image: if
successful, will add (wind powered?) pump to move water uphill to primary
water tank. This image: stage
1 of addition. |
|
Clear a building
site; move empty water tank from present location to uphill of site;call for water delivery; move cleaned
& painted trailer into new position. |
|
|
|