The Extension Of A Stone Wall, 2006 and F11 will give you a truly full screen ...


Click!
A short series: Beginning To End, Inside The Wall. A short series: Beginning To End, Outside The Wall.
Click!
The original walls, 2004

The Extension, Step By Step
Click!
I finally located the small brass SE corner
marker up over the ridge (see next photo).
Click!
Now I was able to find my true property
line instead of just 'eye-balling' it.

It turned out to be left of where I had thought
when I roughed in the road 39 years prior.

So I decided I had to correct the direction
of the retaining wall on the right.

And here it is two days later.


Top down. The lines depict the original
direction and the new (click the image).


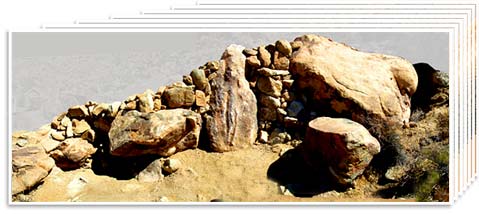
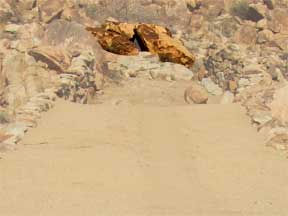
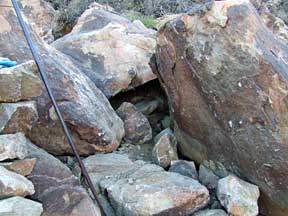
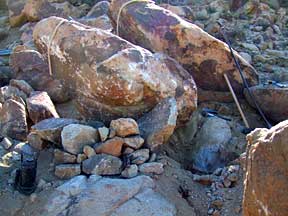
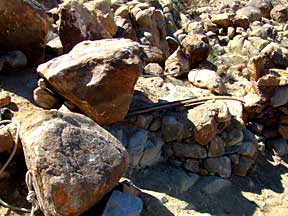
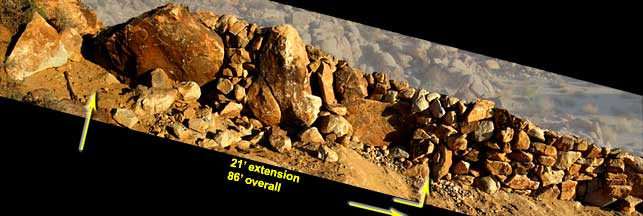
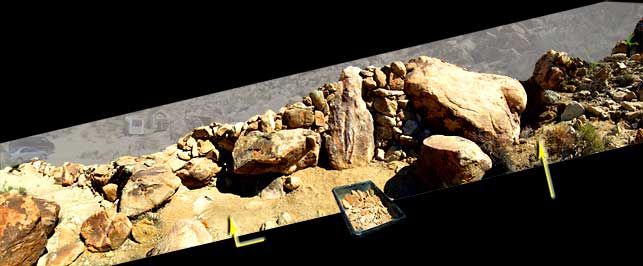
For 6 years,  3 insurmountable problems have
loomed in the back of my mind. Here they are.

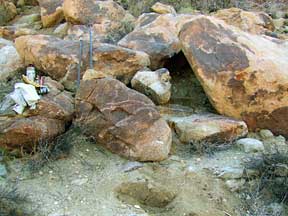
Could they be moved??   I began by focusing
on the biggest rock - the one on the right.

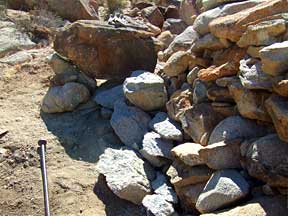
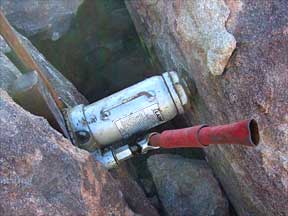
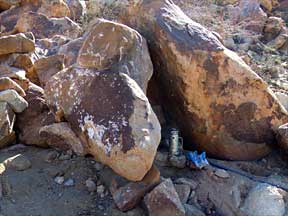
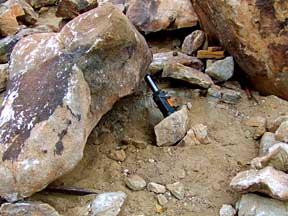
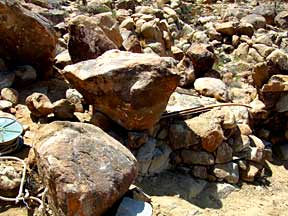
I propped the smaller one up to use
as a base for the hydrolic jack.

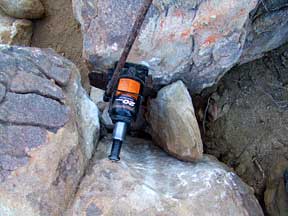
The jack is positioned for maximum leverage.


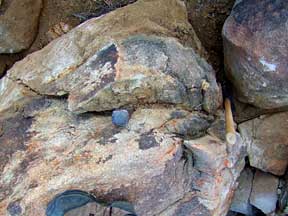
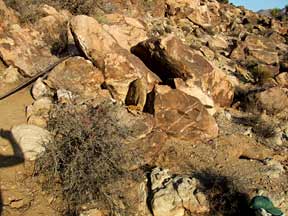
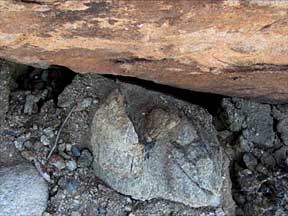
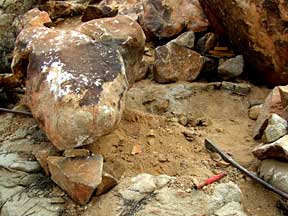
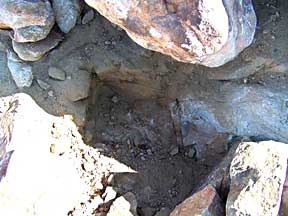
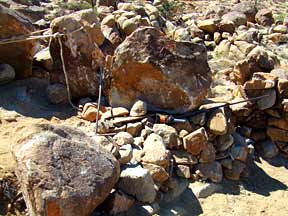
Where the boulder meets the earth,
before pumping the jack.

Beginning to apply gentle but firm pressure ...


Suddenly the boulder lifts quietly from the
pocket it formed so long long ago.

And it lifts some more - as if to say:
"See, that wasn't so bad, was it!"
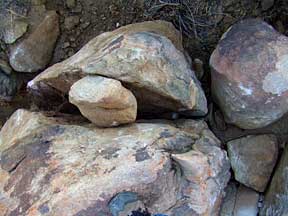
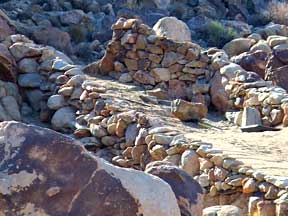
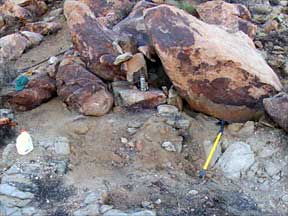
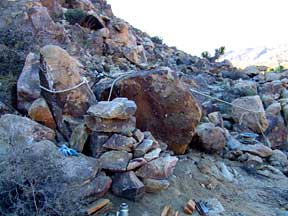
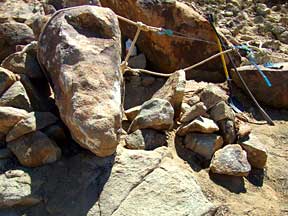
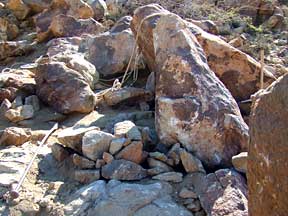
The gap was filled with solid blocks of rock to
lock it in place before the jack was removed.

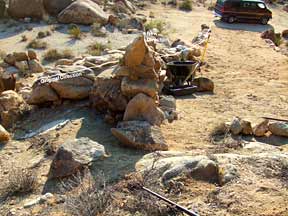
The jack is repositioned, reblocked
and repumped many times until ...

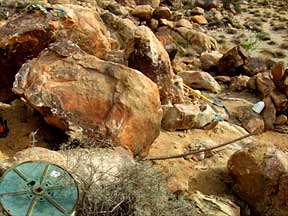
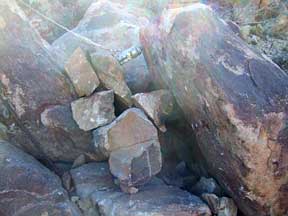
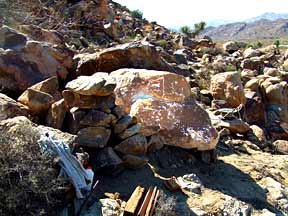
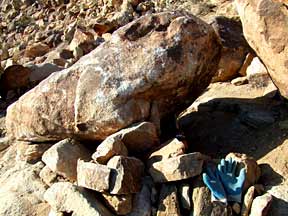
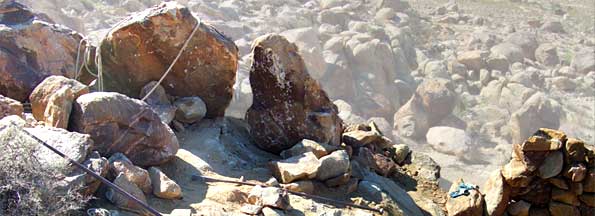
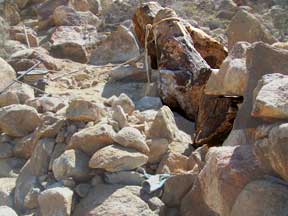
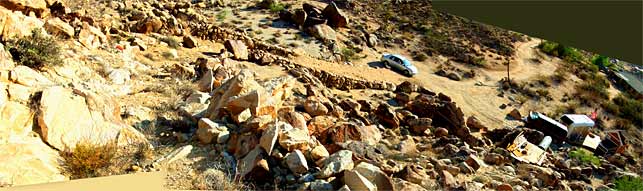
The giant rock is finally in place and ready to hold back tons of road fill as heavy vehicles negotiate the turn.   It took three days to move this rock.


Rock#2 is winched up on its feet and then ...


dropped on its side.


To end up in the correct position on the right,
it must first be pushed to the left. Then ...


The rock is rotated 180 degrees so that its
'back' will end up against the road.

Smaller rocks are positioned to grip
its 'buttucks' and serve as a fulcrum.

Its 'head' is pulled up as its 'foot' rotates down
to where it will hopefully fall where intended.

This hole in the bedrock must receive
the foot and lock it into place.

Beautiful!

This rock took four days to move.


All of this time rock#3 has been hung up on
rock#1, which did help keep #1 in place.

Now it is time to move #3, so it has been pushed
away.   An excess corner is being detached.

This will allow #3 to roll easier. At the other
end it will provide a level base for stacking.


Notice the temporary pedestal constructed
to carry this rock to its new location.


The pedestal readjusted itself some
under the weight, but it held.

This third rock took two days to move.


Inside The Wall
As with all others, clicking this image will open a full screen rendition 1024 pixels wide. 
If you have a high speed connection you can open a 2590 pixel image by clicking HERE.


Outside The Wall
The 'chips' in the tray are wedged into the gaps between stones to lock them in place.  
If you have a high speed connection you can open a 3693 pixel image by clicking HERE.

Way Inside The Wall
I am standing in the spot where we hope to put a spanish adobe (or rock) home one day.
If you have a high speed connection you can open a 6347 pixel image by clicking HERE.

Perhaps the road could lead to
something like this.

But it starts here.

Commentary


Copyright © 2007, Van Blakeman