|
After laying the 1 1/2" ABS pipe from the new 2600 gallon polypropylene water tank to the two in and out valve boxes at ground level, I had gone to work on making full use of this new water supply. From the outflow valve box I had run copper pipe to a tankless water heater, to the trailer's sink, to hot and cold faucets over a catch basin on the deck, and to a pair of bronze shutoff valves where the new outdoor shower would be. I extended the deck around the utility house to support a luxurious shower stall which I then proceeded to build. After all that was done, I then went to work on filling the trenches and raising a stone wall.
Finding wall rock:
 After filling the fairly steep top third of the trench where both pipes run together, I laid in step sized flat rocks, each slightly overlapping the one below, until I had a staircase sturdy enough for carrying rocks up to the stone wall. These steps were locked in place with shims (small wedge shaped stones), soil and water; the water compacting the soil.
In the beginning most of the wall rocks came more or less from the immediate area since there were plenty choose from. However, as the wall grew, the supply of good wall rock diminished, making that staircase very useful as the final top tiers of the wall were being laid. Many rocks were also brought down from the extended areas adjacent to and above the wall.
I was trying to avoid denuding the hillside around the tank area, preferring to leave it looking as natural as possible. I also had to make a point of avoiding some really good wall rocks nearby because they were serving as support for the boulders above them, having established their relationship perhaps centuries before. I did not want to cause an avalanche by removing them, either on top of me or later on when the occasional earthquake or trembler might shake the disturbed boulders loose.
This meant travelling further afield to find good material as the wall grew. By good I mean nearly flat on the top and bottom, and wide enough to cross over the seam(s) between the 2 or more rocks beneath, beginning at wherever the previous rock had just been laid on the same tier. Each had to be carefully selected. It needed to be equal to or slightly smaller in size front to back than the rocks below it, so that the overall wall would slightly taper toward its vertical center as it rose in height. Where the bottom rocks were nearly 20" front to back, the top rocks would be only 5" or less. That gave me a 7' wall, almost. To go higher, the bottom tier would have had to be more than 20".
 Fortunately most of those large flat rocks at or near the bottom were found close at hand and could be slid or flipped into place, though there were a few that had to be coaxed one way or another from relatively far off, this being done with pry bars, sheer will power, lots of forethought and patience. Some might be moved only a foot or two at a time, returning later or the next day to move it a bit more, until it would almost magically end up on the wall. My mindset was such that a movement of 1" in the right direction was considered great progress; never ever mentally allowing the overall distance to enter consideration. If I had done that, I would probably have said "No way!" and forgot about it.
Where the occasional contribution of my entire physical being was required I made sure I was wearing good tight rubber gloves to get a very good grip, and long sleeves to keep my arms from being shredded by the rough surface, which can be distracting. It required placing my feet where they would get a good firm grip, knowing where the next foothold or two would be, keeping my back firm, rotating gently at the waste, and carrying as much of the weight as possible on my thighs or wrapped tightly within my arms and chest. Mentally, every bone, tendon and muscle in my body had to be prepared and focused on the task at hand; no surprises were allowed; no slipping disks or twisting ankles, etc.. At the same time there had to be a certain relaxed flexibility of movement; things that are too tight can break; a sudden change in the dynamics of the moment must be accommodated, or released with care.
At the same time I must be able to abandon a good rock and walk away from it because the potential risk is too great. I did that twice, reluctantly. I could have returned with a heavy rope and winch, some 2x8s and other tools, but then the wall was done before I got around to it. They still sit where I left them, maybe for another wall one day.
Positioning the rocks:
Placement of the bottom tier was of course the most important since it determined where the wall would be. To allow future movement around the tank, that tier had to go as far out as possible. The wall of the pad itself determined where that first tier would go. At its narrowest point, the pad was 11' out from the boulder-bedrock wall that rose on the opposite side. Allowing about a foot on that side to get around the 8' tank left me with only 2' for the wall at that edge of the pad. With maybe a third of the bottom tier projecting beyond the pad I gained another half foot or so.
 Now that the job is done, I can see that the 11' pad was bare minimum. The base of the wall has ended up being only about 4" out from the tank at that point, with less than a foot wide passageway between the opposite side of the tank and the boulder-bedrock wall that rises above it. This is do-able since I am somewhat thin, but when I was trying to carry large rocks through that passageway, it did get somewhat tricky. Were I to do again I would extend the pad out to at least 12', or begin the new wall outside of the pad wall, rather then on top of it.
Of course that 11' stretch is really just what I ended up with after building the pad. The width of the pad was determined more by its location and where the boulders beneath were positioned. Had I put a little more thought into the design of the pad, I could have pushed or tipped those boulders out another foot or so with a hydraulic jack before building the pad wall up and filling in from behind. The end result is that the wall is really too low and the space around the tank too tight.
 I notice, after the fact, that I have a tendancy to do that, and it annoys me. In 2004 I had built a pair of 65' retaining walls to carry a driveway up into the hill. In 2006 I had that filled with dirt and I extended the south side wall to 86'. The area between the walls is about 11'. When driving my van up the incline I find the edges of the drive to be way too close for comfort. Were we to put a house up on the hill, some builders, delivery trucks and visitors might find that unworkable. That width had been determined by the position of some large boulders on the north side and by the property line on the south side. This means that the north side wall will need to be moved out a couple of feet one day, and the obstructing boulders will have to be dealt with.
In fact it was during extension of the south wall in 2006 that I discovered that an immovable monolythic boulder could indeed be moved with a hydrolic jack.
Where this new wall is concerned it will provide a significant amount of shade for the water tank, though it may still not be enough to keep the water cool in summer. I suspect that it could also develop an algea problem, though the manufacturer says that the green plastic will help filter out those particular rays of sunlight. Regardless, a higher wall would have been more effective. We will see how it goes.
Making loose rock solid:
I like concrete cement for footings, foundations, garage floor slabs and sidewalks. Anywhere else above ground level it begins as an eye sore and gradually deteriorates to an abomination. In a rock wall it is just plain ugly; an unsightly obstruction on the landscape. It will self-destruct over time from roots, ice, earthquakes and other natural forces, because it has zero flexibility, becoming even more unsightly as it falls apart. Drive the back roads of almost any city and you will see this urban blight.
On the other hand a pure rock wall is just plain nice to look at, if not a work of natural art. If built with care it will last through the ages, conforming to the affects of nature and of man. It will absorb roots into its very being, making it stronger. It will allow moisture to drain before it can turn to ice. Earthquakes will help it settle into itself, becoming even stronger. Drive the back roads of almost any countryside and you will see these ancient walls still lining the fields or supporting dignified centuries old homes that somehow survived fire and rot.
 ...
...
A new neighbor, renting the house next door, had watched the construction of this wall from her front porch, sometimes with friends. I guess there had been some discussion among them because one day she walked over and asked "How does that wall remain upright?". My answer was "Shims".
To begin with, these rocks have a natural tendancy to cling to each other due to the granular but solid surface, and it helps to match the irregularities when fitting them together. This is a primary consideration when searching for the 'right' rock for a particular spot. Also, centering each rock is obviously necessary. With these stipulations, it isn't always possible to butt a rock up against its neighbor, so a smaller rock is found to fill that gap.
However, it is the shims that lock them into place. I periodically scour the hillside gathering a bucket of shims, small wedge shaped stones ranging in size from a thick 8" stone to a thin 1" wafer, and again with a rough surface; not a smooth quartz that can slip back out. The larger shims fit into the larger holes between the rocks and the smaller shims fill the smaller gaps that remain. They are gently tapped into place with a rock hammer or a rubber mallet being very careful not to move the surrounding rocks in the process. It helps to have a few layers of rock on top of the subject rocks to hold them in place as the shims are being tapped in.


 Outside of the wall this usually means standing on a projecting boulder and holding onto a rope with one hand while inserting shims with the other.
What glues this all together is dirt. After the wall rocks are in place and the holes have been shimed, shovel loads of dirt are thrown up against the wall, filling the remaining holes, seams and cracks. Then the wall is gently sprayed with water to carry the dirt to the empty recesses within.
This works. Eight years before I had built another high wall to shade and hide our original water system.
 I used these methods then, except that I let nature take care of the post-washing of the thrown dirt. That wall has remained standing, has not perceptably altered its configuration, and not one rock has fallen from the wall. [knock on wood] The difference is that I built that wall aginst a large sheet of plywood attached to the rack that supports the water system, which is still in place. Also, one end of that wall wraps around a monolythic boulder. So it is not entirely free standing. The new wall is.
Structural integrity:

 The 20" base rocks at the southeast end of the wall sit on top of a large boulder; they are not hanging out into the open air. That end is sturdy. As that tier circles around and approaches the stretch where support is more limited, they get smaller as they also cantelever out into the open air. That stretch of the wall is not as sturdy. To compensate for that an additional column of support was added inside at the very end - by then it has passed the tank and there is more room to work with. It is a stack of heavy rocks slightly leaning against the wall to counteract the tendency of the wall to lean inward. With shims and dirt, that end becomes as solid as the other.
In fact that was not the first north end. Originally this 19' wall stopped at about 16'. A 3' stretch of space had been left open for bringing rock up to the wall, and a stairway had been provided for that purpose. As it turned out, it was simpler just to bring the rocks up around the southeast end where another extension of the stairway was added. Also, the afternoon sun was hitting the water tank at that end, and that was totally unnecessary. Then it dawned on me that anybody climbing up to the pad from that direction would naturally grab the edge of the wall for support, and it was probably not sturdy enough for that. It would have to go the other 3' where it would also be able to grab hold of a solid boulder just waiting for it only 3' away. And so it was done. Even then it was not quite solid enough so the aforementioned rock column was added.
Burlap or stone:

 Before I had even begun to cut the trenches, I had assummed that the black pipe would end up being exposed here and there for one reason or another. First I did not think I would like the look of the pipe sticking up out of the terrain, but also I have learned that the hard plastic tends to become discolored and brittle when exposed to direct sunlight, suggesting a deterioration that in time could wear it away. I had observed this with a white PVC pipe over the years so I assumed the black ABS would do the same. I had also seen the PVC snap in an extreme freeze. So I bought some burlap at Wal-mart thinking I could wrap it around the pipe wherever it might be exposed. This would blend it into the terrain and also provide a mesh that dirt could cling to, providing more camouflage and even a bit of insulation.
As it turned out, there was only one stretch of pipe exposed to the elements, a 4' pair of pipes that drop from the edge of the pad to a trench cut into the bedrock below. Before permanently gluing those 2 pipes to their elbows, I wrapped some burlap around them. This worked pretty well for the moment but I could see that eventually the loose hanging burlap would fall apart as the sun, wind and rain did their thing. Also, being verticle, dirt did not stick to it very well, so it just looked like a curtain hanging there; not really part of the terrain.
In the end, I decided to cover it with rock. I found a long thin length of stone that had originally been part of the shell around a boulder. These shells tend to break apart and slide off of the large boulders over time. I propped it up against the stone surrounding the pipe and blocked it in with smaller stones. Being thin, it was able to hide the pipe without interfering with the stone stairway that passes by it.
Another wall:
A number of rock walls have been built on this property for various purposes.
 I like the way they establish a permanent means of hiding things I don't want to look at, shading things from the harsh sun, and providing some privacy. I also like to sit and watch them.
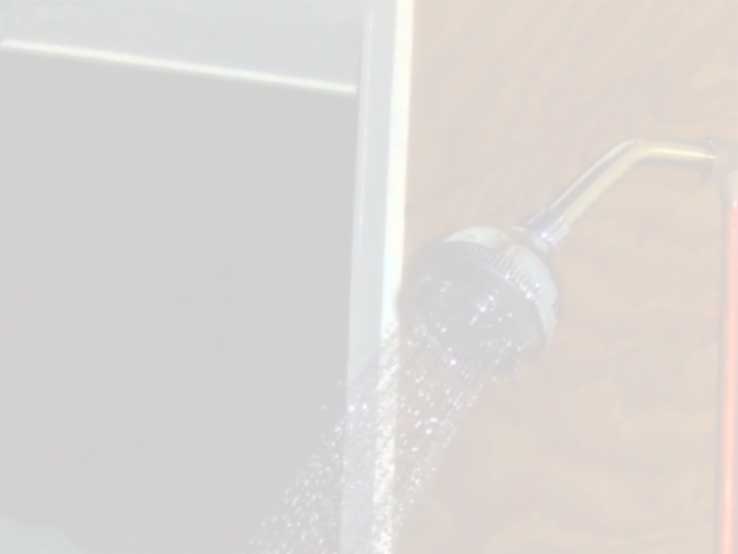
 One of the smaller walls began as a source of privacy while using our chemical toilet, though eventually that was moved indoors. That wall actually sits on top of a much longer retaining wall laid along one side of the wash to fend off any sudden and powerful flows of water. It then became a partial backdrop at the end of a new deck that was shaped to fit the contours of the boulders that the wall sits on. Now it has been incorporated into the cedar wall of a new shower stall.
|