Almost subconsciously, I have been continually kicking myself since January 15. Dumbass! It was freezing out - that's why you ran to warmer climes, wimp! Why didn't you drain the place first? Huh? Idiot!! DUH!!!
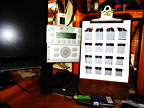 Apparently, my head was not on straight; it was distracted ...
I had been doing battle with a weak and failing power system, formerly my pride and joy, for a couple of months that seemed like years, since our return mid-November. It made no sense! 16 brand new and expensive batteries performing worse then the 12 old ones they had replaced. Waking every morning to weak or no power. Endless testing, endless back and forth with the seller and the manufacturer's rep. They knew I had to be doing something wrong. I knew that that was a very strong possibility. But I could not figure out what! This was frustrating as hell.
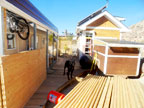 I had begun this season with great expectations. On December 15th I had ordered an 8x10 Lifetime shed from Homedepot.com. On the 26th it arrived. On January 6th I brought home a load of lumber with which I would build an elevated platform to put the shed on.
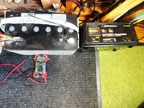 This shed was badly needed. However, the power system had to take precedence so I got back that.
By January 12 I had isolated and removed one questionable battery. I hooked up my car charger and took readings for a week or so. It would not hold its charge. The seller said this was impossible. I tested again.
Eventually, on February 26 I would receive a free replacement from the reluctant seller. The system worked fine through my departure mid-May.
[Note July 7, 2013, 3000 miles away: the power went out on July 2 sometime after a camera sent me a triggered video of nothing interesting at 8:30 PM. I do not know why; this is a first. Three days later, a friend flicked the switch under the inverter and the power resumed. It is working now, two days later. The listed temperature for July 2 was 100 degrees and unusually humid. Otherwise, everything was perfectly normal. I bought my friend a $100 credit by phone at The Natural Sisters Cafe in Joshua Tree, a place that I know she frequents.]
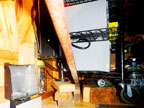 Also on the 12th a 3" castor on the half-ton battery rack broke off. Fortunately the wall caught it. With the help of a 6" iron leverage bar, I was able to nudge some blocks of wood under that 1/8 ton corner.
 On the 13th we woke again to no power. I went for my coffee and Eileen's tea in town. As usual, after the sun came over the hill, we regained power.
 On the 14th it was cold, about 18 degrees. No power. I needed to get away from all this. We got in the car and drove down to Laguna for breakfast, a 2 hour trip. Checked into the Hotel Laguna. Spent the day walking the town and the beach and enjoying some good food.
The next day, the 15th, we returned. The first thing I noticed was that a faucet adapter over the dog water dish was laying on top of the ice in the dish.
Behind that, under the trailer, a shutoff valve had burst and a large icicle ran from the break to the ground. I shut that valve off. The outdoor shower head had burst and there was no water at the sink faucet inside. I shut off the main valve from the water tank, which was empty, and called Wonder Water.
He arrived with a 2000 gallon load at about 5:00 PM. By then I knew that there were no other obvious breaks in the system so I turned the main back on and all was well. Except that the tankless water heater was dripping, but it was a slow drip into the dog water dish, and it was heating the water.
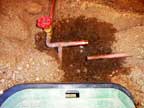 The next day, I completely removed and capped the cold water line to the shower, since by then I had come to realize that in a tankless system it is not needed; you set the temperature at the digital thermostat. However, this is incidental since it was just a pocket of left over water in the head that froze and pushed the head off. Then we would come to discover that we liked it without the head, and as it turns out, so does the tankless water heater. The slight back pressure from the head had been confusing the system which relies on a smooth flow of water to tell it when to turn on and off.
 A few days later, I removed the cover from the water heater and found the drip. I did not even bother to disassemble it any further to find the split in the pipe that I knew would be up in there somewhere. This heater had been a pain in the neck anyhow since I installed it. Perhaps a better way to describe that is that it was a learning experience. It never did work quite right to begin with, as is
well described in past articles that I have written in frustration. I had bought the cheapest one I could get, which therefore was also just a little too weak to begin with. Also, it was an indoor water heater that I had installed outdoors. The indoor one was cheaper, and what the heck; it never gets really cold for long enough to matter. That concept held true for nearly five years.
On the 21st of January, I ordered a new "Rheem RTG-64XLP 6.4 GPM Low NOx Outdoor Tankless Propane Water Heater" on Amazon. It arrived on the 29th.
Eileen and Molly the dog were scheduled to fly east on February 6th, so we decided that I could hold off on shutting down the system until after they were gone.
On the 7th, I removed the old water heater and installed the new one. It has worked like a charm since; no problems. I love it.
Coincidentally, on February 8, two days after Eileen arrived back east, her electric, heat and phones went out during a blizzard. Good thing she was there because she was able to keep the wood stove going during the two day outage, which kept those pipes from freezing.
A week later, I repaired the broken valve in the line to the pond, turned it back on and discovered another split in that line. Repaired that.
I concluded that I would need to line all of these pipes with a collection of heat tapes. I have done that back east on a few occasions where a pipe had in fact partially frozen up more then once. It solved the problem in every case. All were installed more then ten years ago and are still doing the job.
I would need measurements. I would need to know how long each line was, a line being a contiguous series of soldered pipes, elbows, couplers, tees and valves. I also had one older PVC line. All of them ran under the deck, under the trailer and under the 8x8 utility house (aka: shed). I would have to crawl under, often on my back through a one foot space. I did not want to do this. Where I have done so in the past, I have emerged covered with dust, desert microbes and microscopic cacti needles. Even after a thorough shower and change of clothing, I would still itch for days. That also meant that my nostrils and lungs would be full of the same stuff.
I decided that I would do everything I could to avoid that. Which would mean prying up the deck boards wherever a pipe ran below them.
Each heat tape must be slightly shorter then the length of the line; it cannot be longer. Every inch of heat tape must be in contact with a pipe that contains water. There can be no left over stray ends sticking up in the air because they could overheat, burn out and possibly cause a fire.
I am typing this after the fact. I did mistakenly order a few that turned out to be too long which required some experimental ingenuity on my part. That means that during future freeze-ups, I will have to get out there occasionally to make sure that they are not overheating. If they do, then I will have to unplug them periodically and replace them with shorter tapes later on.
I realized that this would require a lot of precise measurements. I could enter them into a spreadsheet. As I thought about it, I also realized that I would also need to measure the deck, etc. and extrapolate the pipe measurements. Now we are talking about perhaps thousands of intricate spreadsheet entries that must add up to numerous accurate subtotals, which in turn must sum up to accurate totals, all of which must be labeled in a meaningful and useful manner. In the end, I would have to be able to make sense of the whole thing which would mean building algorithms that could double-check all computations. Whew!
Then I began to wonder about CAD, something that had always intrigued me. In the past, it was way out of my reach; too expensive, requiring a dedicated and extensive learning curve, and requiring a very powerful computer with lots of memory and a big hard drive. Now the latter had become the norm. I decide to research it. Maybe the price had come down.
I was amazed at what I discovered.
Google's SketchUp (created by Trimble). It was free. Everybody who had used it was raving about it and its short learning curve. I had never even heard of it! Where had I been??
I downloaded SketchUp on January 19, 2013. I studied all available YouTube videos and the numerous articles, and somewhere in all that began to create my own sketch. They even had a library, 3D Warehouse, of sketches already created by others and generously made available to anybody that needs them. Throughout my subsequent creations, I downloaded and incorporated such things as copper fittings, electrical conduit, GFCI outlet, GFCI cover, PVC pipe and fittings, Simpson straps and hangers, tankless water heater components, an AC Plug, numerous textures, etc., etc..
What I did not find was one of my most basic items, a post base, that aluminum block you see on the bottom of almost every post I install. Its main purpose is to separate the wood from the concrete so that the wood cannot leach moisture from the concrete, which can rot the wood and weaken the concrete.
Its secondary purpose is to help lock the post into place. It has a center hole about 1 1/2" in diameter. I sink a 1" PVC pipe down through the concrete footing when I pour it, which will go through the hole in the post base and up through a hole I have drilled up into the post. That is the ideal setup and it usually works out that way. On
the shed platform that I eventually built, I screwed up my measurements so that the PVC pipe had to be clamped to the outside of the post. It still locked the post into place, but looks like crap.
The post base became my first SketchUp project, designing it from scratch. I set an actual post base and ruler on my desk and began to recreate each aspect of the base to scale on the computer screen. SketchUp makes this easy and intuitive. The only real learning curve is figuring out which SketchUp tool does what, including how the Ctrl, Shift and Alt keys on the keyboard affect each tool.
My second project was the deck itself. It began with loading a background image of the deck frame, which I had taken in 2003, into SketchUp and telling it where the three x, y and vertical axis lines were in the photo. From that SketchUp was able to deduce a proper 3D perspective of the frame. In other words, as I traced over a 2x8 joist, SketchUp knew what direction to go in. From that and perhaps a thousand trips out the door with rulers and a small pry bar, a reasonably accurate 3D image of the deck came into being. By "reasonably", I mean that maybe 95% of the CAD results were dead on, but some longer accumulations of the CAD dimensions were as much as 3/8" off.
I think I pried up at least half of the deck boards just to get measurements and stick my camera down under along with various rulers to get pictures that I could immediately transfer into the computer so that I could sit there, study them and adjust the individual boards in SketchUp to their actual dimensions.
Keep in mind that the deck has changed shape since 2003. For instance, the new joists that were 1 5/8" thick then were now 1 1/2". Likewise, the finishing nails that had a good grip back then were now relatively loose. On every board that I pried up, I replaced each nail with a screw. This made the deck sturdier overall. It will also make it easier to open up as needed in the future.
What makes the CAD image really useful, even almost magical, is that I can flip it around to view it from any angle including upside-down. Once the plumbing and electric were sketched in, I could measure the pipe to determine exactly how long the heat tapes would have to be, including where I would have to install the outlets for them to plug into. However, as mentioned, I had forgotten that they have to be shorter then the pipe, so a few ended up being too long.
I resolved this by wrapping some of them around the pipe instead of just running them along the recommended bottom of the pipe. On others I looped the excess around to the opposite side and ran that short excess back the way it had come. That put the edge of that loop on edge so I made sure the entire edge was solidly in contact with the pipe and thoroughly taped in place.
I did not want to use the suggested electrical tape to attach the heat tape to the pipe. I know from experience that over time, electrical tape dries up, loosens and leaves a black mess of dirty old glue behind. In my search for an alternative, I discovered something relatively new and excellent for the job: black silicone tape. It has no glue and sticks to nothing except itself, and that grip is permanent, unless you need to cut it off some day. You stretch it like rubber tight around the pipe, heat tape and itself, snip it, and it will remain like that almost forever.
I am talking about the black silicone tape that I bought at Home Depot. I also ordered a clear silicone tape online. It works, but it does not grip as well as the black. That just means that you need to give it another wrap and then check it a week later to make sure it held.
My third SketchUp project was
the new shed platform and staircase which I designed before I began construction, and during. By first designing it in SketchUp, I was able to begin with the space available between and above boulders, and with the actual dimensions of the lumber and plywood, and extrapolate from there. I did this from scratch without the aid of a background image, which may have been a mistake.
I realize now that if I had begun with a photo of the area, I would have seen exactly where the posts should hit the ground in the photo. The overlaid sketch would automatically be squared off. Then when I began to position those corners during construction, I would see that something was not matching up. Then perhaps it would have dawned on me to "Oh yeh. Square the frame first."
Usually, with my numerous coffee breaks where I sit and casually stare at the thing, these "Oh yeh" moments come to me, but not this time. Of course it did eventually sink in, but after I had already poured the concrete piers. Then I stretched a rope between the opposite corners of the longest leg of the X that the 4 corners make, until both legs of the X were equal, and each corner was in fact square.
Enough talk and self-lashing. A gallery of pictures that tell this story are on the next page. You can click on the first gallery image, and then use the right-arrow on your keyboard to page through all of the full screen versions.
|
|