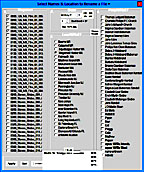
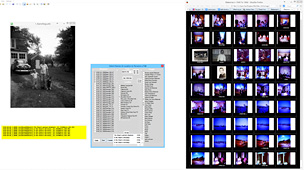
|
What My Programs Do |
This web page, describing what each of my AutoHotkey.exe programs do, was created primarily because I tend to forget exactly what they do and how they do it.
I then got to thinking that had I been able to find something like this when I first began this programming, it could have helped me get my head around it a lot sooner, so I put it online. Maybe it will help someone else.
Of course, I am quite proud of my more recent creations and am happy to tell the world all about it. They are almost elegant, as apposed to my earlier works which got the job done but are, or were, something of a mess internally. I have learned new things since then and have re-written those. The point is that AHK will let you do what you need to do, regardless of proficiency.
AutoHotkey is a sophisticated easy to understand programming language that does far more then just create hot keys. For that matter, I have not even created any hot keys, to date. Though they took some time to write and refine (actually, still tweaking), they have reduced the time I used to spend manually performing the same tasks by weeks, if not months.
Many of them begin by closing Dropbox.exe, which I normally have running 24/7, to stop Dropbox from uploading a data file while it is being worked on, sorted, etc.. If Dropbox is not closed, then some records within the working database do in fact mysteriously get lost. The routine then re-runs Dropbox when it has done its job. This precaution would probably apply to any software designed to integrate with the 'Cloud'. Should you need to know, here are the necessary lines in the Windows operating system:
5. OnExit, Quit
6. Process, close, Dropbox.exe
...
250. Quit:
251. GuiClose:
252. GuiEscape:
253. Run C:\Program Files (x86)\Dropbox\Client\Dropbox.exe
254. ExitApp
All of these programs deal with different aspects of photography. Though I studied the art in college and even built my own darkroom and even in fact got paid once or twice to take some pictures, I am not a photographer. I eventually had to face the fact that I do not have the eye.
I also studied creative writing, but I am not a writer. I have written a lot of stuff since then, some of which even went through the full repetitive rejection route, and it is all carefully filed away. More recently I have subjected a lot of people to my writings on my web site, and I do occasionally get a glowing comment, but I have not made a profession of it.
Shortly after college, I discovered and fell in love with computer programming. I studied it at a technical school and then proceeded to make a profession of that.
The photos that these programs deal with are in three distinctly separate groups:
1. digital photos taken by a succession of hand-held digital cameras since 2001.The primary and constantly expanding group is my vast collection of digital shots taken since I bought my first digital camera in 2001. The originals have never been altered or deleted - that is, since 2003. The missing numbers from 2001 and 2002 will forever plague me; what were they?? Those that I enhanced and re-saved by the same name back then (with limited technology and limited knowledge) will never get another chance.
2. digital photos captured by our webcams, triggered by movement. Some are selectively renamed and saved; the rest are stored away.
3. digitized negatives taken by my Dad, myself and other family beginning in 1943 and up through the year 2000.
The simple act of opening, altering and re-saving a JPEG image removes pixels, so there is less to work with in the future as the technology and one's knowledge improve. My iron-clad rule now is to save it under a slightly different name so that the original remains intact - and never ever delete an original.
These are stored in the \Photos folder, which are currently separated into two subfolders, \CA and \CC, since we live part of the year in California and part in Cape Cod. I am toying with the idea of removing these two subfolders and making everything truly chronological. I could write a program to do that or just use something like SilverAge Software's HandyFile Find And Replace and Funduc Software's Shortcut Doctor to do the job. Both programs are excellent. (Note: 6 months or so later, I have in fact done so.)
To put all this in perspective, here is what the path to one image file did look like:
C:\Users\Van\OneDrive\Photos\CC\CC14\279\2796156_140915.jpgEach of the \CA and \CC folders are then broken down into annual subfolders such as \CA\CA01 and \CC\CC14, etc..
Each of these annual folders contain a series of numerical subfolders such as \000 - \031 in \CC01 and \266 - \276 in \CA13, regardless of location. Each filename begins with its folder number, such as 2796156_140915.jpg. Each 3 digit subfolder may contain up to 250 (give or take) photos, often separated by subject matter; sometimes separated just because the list of files in a folder was getting too long.
Actually, a few years after writing that, it dawned on me that 'too long' is okay. When I am searching for something, like all pictures of the pond-filling frog, it is nice to have a screen full of "thumbnail" pics that you can just endlessly page on down through, without having to stop and select the next folder.
I use Breeze System's Downloader Pro to move each batch of new photos from the camera into the current subfolder. It renames each photo to my 7 digit numerical filename, auto-incrementing as it goes along, and adding the photo date to each name.
Except for my most recent purchase of an Olympus TG-5 Waterproof Camera...
Downloader Pro did not work correctly with this camera. I quickly had to learn the included software provided by Olympus. Not as clean and simple as Downloader Pro, it does Import and Export (remember, you do have to do both) the photos and it does name them as I want them named, automatically incrementing with each.
The only glaring defect in the Olympus software is that it does not remember the last number used. DP did not have this problem. You also have to absolutely remember to find and give it that next number. If you forget that non-obvious click, all of your new photos will be quickly misnamed before you realize what you did (or didn't).
In which case you have to drag them into the Advanced Renamer's window to repair them.
The Programs:
1. Stream today's triggered motions full size - save 1 or 2 and/or Describe past saves and/or Merge them into the Photo folders |
|
I prefer the multi-tabbed
Xplorer2, by Zabkat, for organizing my folders and files. I used to like the original File Explorer for viewing a thumbnail gallery full screen. However, for the last few years that has been misbehaving (it could be my computer that is at fault). So now I have another Xplorer2 version saved as an alternate Layout which presents all photos in a folder at any size I want which is defined in Tools/Options as an optional thumbnail size of 400 pixels, larger then what File Explorer shows you (or does not). These Xplorer2 pics always show fast and sharp while File Explorer pics show me nothing but blank outlines. |
(A click on any small image opens a full sized image. Lock it into place by dragging your mouse off of it.) |
Code\Parse01 files: 0_RemoteToLocal.ahk 1_WebcamSelections.ahk 1b_Diagnostics.ahk 1c_CreatePicFileList.ahk 1d_CreateCardSizedPics.ahk 2_StreamNewCamPics.ahk 3_DateSavedPics_Categorize.ahk 3b_Categorize.ahk 4_MotionsToPhotos.ahk |
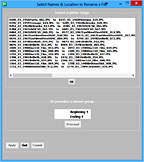
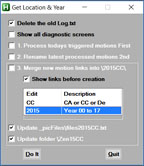
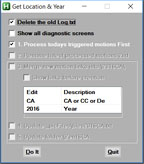
1_WebcamSelections.ahk opens a small dialog box which offers 3 primary selections: 1. Process today's motion triggered pics which runs 2_StreamNewCamPics.ahk |
|
0_RemoteToLocal.ahk does not belong here; this is just where I put it when I was in a hurry. It has nothing to do with the files listed below, but it does save a big semi-annual hassle. It is run periodically by "Move remote OneDrive pics to local folder.xml" in the Windows Task Scheduler. It is also run by 2_StreamNewCamPics.ahk every time that is run (okay, so it does kinda belong here).
It eliminates the need to manually change the Blue Iris Post URL twice a year for each camera. Now all triggered snapshots Post to a local folder, and 0_RemoteToLocal.ahk moves any remote pics that may have come across the internet every half hour from OneDrive to a local folder or from the local folder to OneDrive depending on where I happen to be. It checks the status of the A_TimeIdlePhysical variable to determine that.
Of course every time I go to the opposite computer through RemotePC, it trips that timer. So the software asks "Are you really here?". If I don't answer, it times out and goes away.
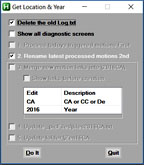
1_WebcamSelections.ahk: In option 3 the user first selects or types a location (CA or CC) and a year, which would be the current or previous year, depending on whether or not the current year's folder has any photos in it. (Okay, I am the only 'User' here. But, who knows, perhaps one day I might make it a bit more flexible and put it on the market. Dream on ...)
When the user clicks on the [Do It] button, a complete list of all folders and files for that year-location in the \Photos folder is created and saved in a dedicated \Photos\_PicFiles folder along with similar lists for other year-locations. The name of that new file list is shown in the selection box above the buttons, ie: files2016CC.txt. This file will be used by 4_MotionsToPhotos.ahk below and perhaps in other routines.
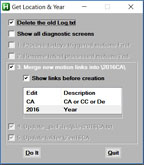
It might help to clarify what I mean by "year". The East coast photos usually begin in May and end in the fall when we depart for CA, so they are all within the same year. The West coast photos begin when we arrive there the next day, but they proceed into May of the following year. So, for example, the 2017 CA photos actually range from November 2016 to May 2017 even though they are all in the 2016 CA folder.
It also creates a subfolder in that year-location folder of card sized copies of all pics in the selected year-location for use in galleries, as described below, that will need to display the contents of that year-location. For example, that subfolder under 2013CA is named Zen13CA, "Zen" simply so that it will sort to the bottom. One such routine is 02_ChooseWebPagePhotos.ahk under 01_WebPageCreationDialog.ahk below.
The above creates \1a_LocYr.txt to store the selected location, year and Diagnostic status for use in 4_MotionsToPhotos.ahk below.
Likewise, \Code\_UserLocYr.txt stores the same info, plus some, in the parent folder for use by these and other existing and potential programs instead of 1a_LocYr.txt, though for now I am keeping both active.
1b_Diagnostics.ahk: throughout all of my programming, I include various features that tell me what is going on behind the scenes, as needed.
One method is to write pertinent data to Log.txt at the beginning, middle and/or end of almost every subroutine (module) in the program, i.e. "Logthis("GetNextYears1stDate: dateY = ",dateY)". Of course, each program includes a dedicated Logthis: routine at the bottom. That allows for in-depth analysis after the fact.
I so rarely refer to that Log.txt anymore because the methods described below almost always give me what I need to know. I am gradually removing these Logthis() lines and nicely uncluttering the surrounding code.
To get real time info as it happens, I throw a MsgBox on the screen that pauses the action and provides relevant data of my choosing. The [OK] button continues the action; [Cancel] exits the program. The MsgBox line is then nulled, moved or removed when no longer needed in that spot.
Occasionally that collection of data can become rather extensive and sometimes hard to read because the MsgBox function does not allow for any real formatting.
It also appears center screen only.
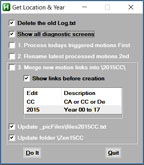
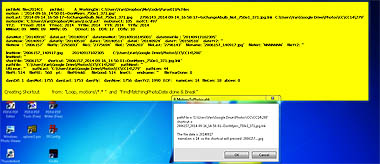
I make extensive use of an additional function in 1_WebcamSelections.ahk and 4_MotionsToPhotos.ahk, called a Progress window, which I named "Diagnostics". It does allow for considerably more formatting, including position on the screen, and is therefore easier to read.
The #Include function loads it into the calling program. It can be checked on and off in the initial selection box (click on the box to the right of this paragraph) or it can be set only to appear when a new motion shortcut is about to be created.
The code can look something like this:
Within 1_WebcamSelections.ahk and 4_MotionsToPhotos.ahk:
... |
||
Within 1b_Diagnostics.ahk:
Diagnostics: |
Of course, 1b_Diagnostics.ahk can be #Included in any program; not just the two mentioned. All that is required is that the variable names be consistent in spelling and perhaps in meaning.
Processing Motion Triggered Webcam Images
 At this time, there are 5 webcams running at our California home and one at our east coast home. Hence, there are 6 folders that all triggered images are posted to by the
Blue Iris webcam software that I use.
At this time, there are 5 webcams running at our California home and one at our east coast home. Hence, there are 6 folders that all triggered images are posted to by the
Blue Iris webcam software that I use.The local cam shots are Posted to the local external harddrive (F:). Cam shots from the distant cams 3000 miles away are Posted to Microsoft's OneDrive cloud folder. The software knows where to find them by determining which computer it is on: "EnvGet, PCenvget, COMPUTERNAME ;PC-EAST-64 or PC-WEST-64d".
On the West coast, they are:
C:\Users\Van\OneDrive\Webcams\750e1E |
On the East coast, they are:
F:\BlueIris\UnViewedCams\750e1E |
Presently I adjust these destinations in Blue Iris manually on the local computer just before I leave for the opposite coast, and then on the opposite computer when I arrive. If I don't get to it, it can be done through RemotePC after I get there. I may write a routine that will do this for me when it detects which computer I am on. (2018: I have done so. I'll write about it ASAP)
One note of caution regarding the images that do get transferred. I originally wrote this to put everything on OneDrive and Delete the unwanted files after viewing. This deletes the in-house images permanently but their duplicates on the opposite coast end up in the Recycle Bin, which can overwhelm the hard drive on that end. The solution was to go there periodically with RemotePC and Empty the Recycle Bin.
This of course created the inevitable problem of trying to determine who that guy was that was going back and forth to our front door a week prior. Only one pic had been saved; the rest were deleted. We finally figured that out and all was well but we relearned my old lesson: "Never ever delete". Installing those multi-terabyte external drives eliminated the need to delete those "unneeded" files just to make space.
|
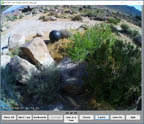
2_StreamNewCamPics.ahk streams the contents of each folder in a window on the computer screen. The user can slow the streaming down or speed it up. He can stream backwards and forwards. At any point he can capture a file name and insert a subject. The newly named file will be saved to the \Motion folder. He can stop the stream and proceed or back up one image at a time. When all have been viewed, he can [Move All] to the F:\BlueIris\ViewedCams folder on the external drive. |
|
|
The path to the Motion folder is C:\Users\Van\Dropbox\Wcams\Motion, so the same Motion folder (being in the Dropbox cloud) is used on both coasts. |
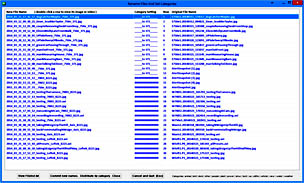
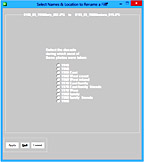
 3_DateSavedPics_Categorize.ahk renames and lists all images in the \Motion folder, generically renaming them to begin with their date-time so that they will sort and display chronologically. This new suggested filename in the left-hand column can be edited. A double-click will bring up its image on the screen. A third click will run 3b_Categorize.ahk, which brings up a dialog box for selecting categories.
There can be an assortment of different types of .JPG and .AVI files, depending on where they came from. Most are images triggered by movement and automatically sent to the \Motion folder. The webcam software also saves a concurrent video which the user can also right-click Save to the \Motion folder, or drag from the webcam's storage folder. The user can also click to grab a snapshot of what he sees in the Blue Iris window.
Blue Iris makes this a breeze; the included software of the 3 manufacturers do not.
The Axis Camera Station that came with its camera is way too complex and occasionally prone to weird malfunctions.
The Loftek Sentinel-D1 browser plug-in is too limited.
 I have learned to only use them to set up their PTZ presets (where each position of the lens will point). Otherwise, I use Blue Iris for everything local, for all webcams.
I occasionally find a need to use the Logitech Alert Commander locally. To view the Logitech cams when I am away, I use the Logitech Alert Web Commander in my browser. It is a paid subscription but it does work on almost every device including my wife's iPhone, but not my Windows phone as of this writing.
Almost everything in Blue Iris is configurable so that I can make sure that all files are named in the same manner. Each begins with the location, the cam name and the date-time. The time is 24 hour so all files sort chronologically. Blue Iris gives me a choice of how I want to receive these pics, so I set it up to automatically Post each triggered image to a dedicated folder. In turn, 3_DateSavedPics_Categorize.ahk knows where to find them. Also, Ken Pletzer, the gentleman who created Blue Iris, responds to my emails and often incorporates my requests into the next update of Blue Iris. I tried that with Axis, and I was basically told to stuff it. The Loftek people do not even write legible English, if they respond at all.
Oddly, Logitech is not all that configurable; you take what you get and then deal with it. Some of their filenames begin with the camera name and include a date-time, though for some reason they use a 12 hour time, so the files do not sort chronologically. I name each camera with a location and the camera name, i.e. JT_750e1, but that is all you get.
 Snapshots from the web screen do not even give you that; all of them are named AlertSnapshot.jpg. They do not Post; they send you an email with the image attached. Before I discovered Blue Iris, I was able to create macros in Mozilla Thunderbird's email program that would extract the image to a specific folder. That worked.
The Logitech software is very well done, but the thinking of the Logitech management is not too logical. Their tech support is top notch, but they do not respond to suggestions.
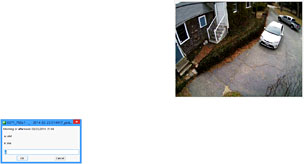
To handle Logitech's AlertSnapshot pics, this program puts the image up on the screen and provides up to three input boxes, depending on the source of the file. One asks the user to select AM or PM. Another asks for East or West. If the answer is West, it asks for which of three Logitech cameras. After this information is gathered, the normal list is displayed.
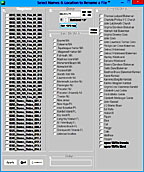
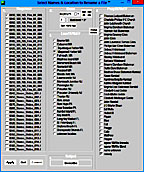
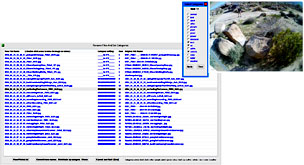
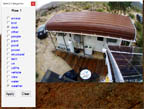 3b_Categorize.ahk presents a list of checkbox categories in a dialog box. The user can check off all that apply to the adjacent image. This is not provided for east coast images since there is no real need for categories from one webcam that sees only one subject matter. On the other hand, west coast images tend to be about any number of subjects, and they are frequently referred to and used in the creation of the annual journal, other articles and subject oriented galleries. Some have even gone into
Eileen's books. Others are online in our
Pinterest collection of snapshots.
3b_Categorize.ahk presents a list of checkbox categories in a dialog box. The user can check off all that apply to the adjacent image. This is not provided for east coast images since there is no real need for categories from one webcam that sees only one subject matter. On the other hand, west coast images tend to be about any number of subjects, and they are frequently referred to and used in the creation of the annual journal, other articles and subject oriented galleries. Some have even gone into
Eileen's books. Others are online in our
Pinterest collection of snapshots.When the editing window is closed, all renamed files are moved out of the \Motion folder and into the respective \Loc\East folder or the \Loc\West folder. For the categorized West coast images, shortcuts to each are placed in respective subfolder categories.
As the path to the Motion folder is C:\Users\Van\Dropbox\Wcams\Motion,
the path to the location folder is C:\Users\Van\Dropbox\Wcams\Loc\East or \West
4_MotionsToPhotos.ahk merges links to the saved webcam shots into my collection of digital photos. Then their "thumbnails" (actually, they are more card sized then thumb sized) can be viewed chronologically along with the photos that I took at or near the same time. It retrieves the user's selected location, year and diagnostic preference from 1a_LocYr.txt which was saved by 1_WebcamSelections.ahk. It then goes through the new motion triggered snapshots and videos, one by one, that were saved by the 3_DateSavedPics_Categorize.ahk routine in the selected location's \East or \West folder.
It refers to the file list for the selected year-location (ie: files2016CC.txt) that was created in 1_WebcamSelections.ahk to find a photograph in the \Photos folder with the same date or the nearest. It then plugs a link (shortcut) to that motion into that \Photos position.
This is a complete re-think and re-write of the previous iteration, though it does include some of the better modules from that version.
It begins by providing the user with a means of selecting and then rearranging photos that will be used in the intended subject's story and/or gallery.
That capability was not even attempted in version 1.

01_WebPageCreationDialog.ahk provides a menu of the 5(+1) operations below. Here's the list:
The first selection refers to another operation that is performed in a completely separate project, 1_WebcamSelections.ahk. There a folder called \ZenYYCA (YY = year) was created containing card sized copies of all photos in that year-location's collection. These card sized copies need to be kept up to date.
1a. Shows all of \ZenYYCA's card sized pics, OR only selected cards in \Cards\use. Update \_picFiles\fileRanges.txt first. This sets up basics. Optionally, user can select pics for the new subject page. On 'Save all & Quit', each gets a 3 digit prefix. 1b. User has created the empty \subj\Pics0- folder by now, and/or ... he could have dragged shortcuts from relative files into that subject's \Pics0- folder (or into \Cards\use). Names Subject page here. \Cards\use must be empty for them to be discovered. 1c. User may have put special merges in ...\subj\Pics0-. Or, user could have dragged shortcuts directly into \Cards\use. The subject's \Pics0- folder may contain already enhanced files. 2. User rearranges selected pics into a more logical order. Or, user can alter prefixes to resort filenames. On Quit, 2 files for each go into \Pics0-; the original and 1 resized to x1050. 3. Run Photoshop to (cut and) enhance each pic in \Subj\Pics0-. A x1050 page size copy and a x216 gallery or x108 journal size must be saved back into \Subj\Pics0-. These heights are specific; the widths may vary. 4. Create a web page for each x1050 pic, with linked arrows. This can run Parse01\1c_CreatePicFileList.ahk and 1d_CreateCardSizedPics.ahk to update fileRanges.txt and the ZenYYCA folder. User types title for each htm as it goes into subject's \Pics0- folder. 5. Create subject page/gallery and comment page, or Journal pair(+). Each x216 or x108 pic links to its full screen .htm web page created in 4., which also links to its neighbors and to this main subject page. 6. If the user rearranged the new subject page's html code: Optionally, this can recreate the image web pages (created in 4.) according to the new arrangement in the main subject page, if any. 7. When all is tested and the job is done: Delete 04_Filelist.txt and 12_Specs.txt. Delete excess files (*._orig.jpg and *._x1050.jpg) in \subj\Pics0-, and clear the contents of \Cards\done, \Cards\use, \Cards\xcess.
Concerning the CA in various names, almost all of this work tends to involve photos taken in California. However, it could easily be a CC for photos taken in Cape Cod.
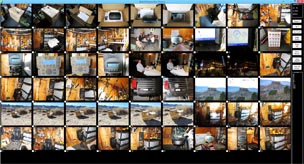 02_ChooseWebPagePhotos.ahk displays a screen full of the card sized pics from the selected year-location folder.
First the user must select the desired \ZenYYCA folder that these small pics are stored in.
Unfortunately, Autohotkey is unable to easily create scroll bars for such a display, so [Page Down] and [Page Up] buttons are provided for that. Each pic is numbered consecutively from 1 to whatever, and a check box is provided under each so that the pic can be selected. When the user is done, all checks are saved to a .txt file for safe-keeping in case he returns later to continue making selections. All selected pic filenames and their paths to the respective original folders are saved in another file called 02_SelectedPicsYYCA.txt.
The selected card sized pics are copied to a new working folder called \batch.use. In the process, each filename is assigned a consecutive triple digit prefix such as 010_, 020_, 030_, etc..
03_ArrangeSelections.ahk displays the card sized pics found in \batch.use with their prefixed filenames inside edit boxes under the relevant pics. Each name can be edited to add a description of the pic, and the prefix can be changed which will cause it to sort into a different position relative to the others.
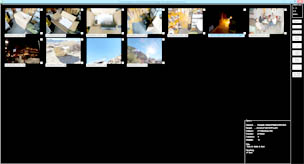
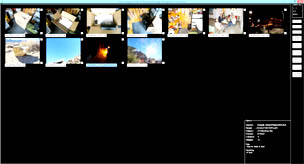
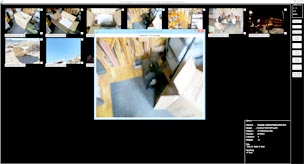
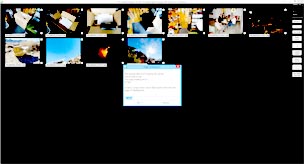
Here the user also provides the name of the subject .htm file that will display these pics, the desired column count if a gallery, the browser's required page title, and the heading, if any, that will show near the top of the page.
When the user quits this screen, a copy of each original is found, reduced to 1024x768 and added to their smaller copies in \batch.use.
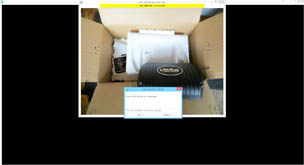
Photoshop: The larger 1024x pics are copied from \batch.use into Photoshop. They are enhanced and saved to the subject's web page folder along with a gallery copy sized 288x or 144x, depending on need. Their filenames will include the prefixes so that they will continue to sort in the desired order on the final subject page.
04_CreateImagePages.ahk creates an .htm web page for each 1024x enhanced photo, each page with arrows leading the previous and next pics, and an arrow to the subject's home page. The user types a browser page title for each.
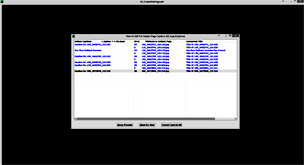 05_CreateWebPage.ahk creates the subject's home page displaying the 288x or 144x gallery pics, each with a caption typed by the user, or none. It may also incorporate a textual story written by the user, with or without some gallery pics woven into the text.
The program has completed its task. The user will now probably load the subject's .htm page into a text editor like Notepad2.exe for continued refinement.
Code\Parse03 files: 50_CreateIndexTree.ahk 50_Year.ahk 52_YrToTree2.ahk 54_YrToTree3.ahk 54_YrToTree3_Gather.ahk 54_YrToTree3_Update.ahk 60_YrToTree4_treePics.ahk |
Indexing Selected Photos Used In The Current Year's Joshua Tree Story |
Each new edition of the annual multi-subject Joshua Tree story adds a number of new photos to the web site and to the web in general, so they need to be searchable if they are going to do anybody any good.
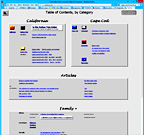
There are four levels to the index beginning with the most general and briefest TOC that people see when they click on the [Table of Contents] button on my index.htm home page "Van's Journal".
- ../_Tree/Tree01_master.htm, with a title of Table of Contents, by Category, includes a [to the Joshua Tree Index] button, along with links to everything else, mostly articles or pictorial essays that relate to Cape Cod, my wifes shop and books, daughters' graduations, ranches owned by family or that I have worked on, etc... Not just photos here.
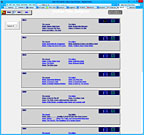
- ../_Tree/Tree02_JTmaster.htm is entitled Joshua Tree Subjects. It contains a vertical series of page wide but vertically narrow boxes of links to the subjects covered in each year since 2001, the year we began our annual six month adventures (six+ for me; four- for Eileen; usually). Again, something more than photos.
- ../_Tree/Tree03_JTtext.htm, A Joshua Tree Photo Index, contains only textual links to most photos relative to each year since 2001, all on one long and growing page. On this page, a person can search for anything that occured since 2001, as long as it is in the list. ie: a search for "electric" in its search box highlights 10 instances on that page going back to 2007. "rabbit" gets 4. Etc.
The footprint of this page in a browser's bandwidth is small, in spite of there being over a thousand textual links all together. Text and a few small icon buttons and one floating javascript search box don't take up much space, for now.
The file size of Tree03_JTtext.htm is 208 KB. That ain't much. Add in 4 KB for searchpage.js, still good. Opening it up as the only page in the Microsoft Edge browser shows it (and Edge) consuming only 20.2 MB of memory, according to the Windows Task Manager, itself 12.2 MB. Compare that to Windows Explorer containing 115 items consuming 55.1 MB. Adobe Photoshop, with no pics: 140.1 MB. Blue Iris Webcam Software with 4 cameras (at this time): 344.1 MB. This is all very interesting.
Each yearly collection in this index and in the previous index includes an icon link to a dedicated gallery of the same items for that year:
- ../_Tree/Tree04_JTYYtreePics.htm, A Joshua Tree Photo Index 20YY, shows a gallery of matchbook sized image links to the web site photos used in the corresponding year's articles, galleries and journal. This index can also be accessed directly from that year's Joshua Tree web site.

50_CreateIndexTree.ahk offers a menu allowing the user to update or create the various indexes, as a textual list and as a thumbnail display, that should help anybody viewing the web page or using a search engine find a specific subject or image, either from the main home page TOC or from the respective year's web page.
 It runs 50_Year.ahk to get the subject year from the user. From that, it extrapolates the name of the Joshua Tree web page (ie: JT14.htm) and the path to that page. It saves this info to SubjectYear.txt which is then referenced by all of the following programs.
The 1st screen of the TOC series is " Table of Contents, by Category". Its html is occasionally updated manually, but it does not get an annual update programmatically.
52_YrToTree2.ahk updates the 2nd screen, " Joshua Tree Subjects" (Tree02_JTmaster.htm). It gets the new year's block of gallery and journal subjects (usually 6 to 8) from \JTYY\Subjects.txt which the user should have viewed and edited by now. It copies the existing page header (CSS code, scripts, etc.) from Tree02_JTmaster.htm to a temporary file Tree02_header.htm, and the remainder (the previous years and footer) to another temporary file Tree02_years.htm.
It then reassembles Tree02_header.htm, the new Subject block, and Tree02_years.htm into a new Tree02_JTmaster.htm.
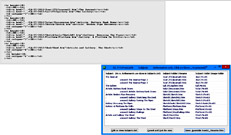 By now, the user has explored the Pics01(+) folders of all subjects in the new year and dragged selected shortcuts to C:\BU\Parse\03\Files, all image files wanted for inclusion in each of 3 alternative indexes.
To see an index to the links offered for any year, in this second index screen a user can choose between two alternative third index screens, a textual screen of all years or a gallery of thumbnails for one year. These links can be any quantity, depending on how extensive that year's web site was. For 2006, there were about 50 image links provided. In 2012, there were 185. The links are grouped by category, such as People, Flora, Power, Structural, Interior, Other, etc..
54_YrToTree3.ahk updates the textual 3rd screen, " A Joshua Tree Photo Index" (Tree03_JTtext.htm). It runs 54_YrToTree3_Gather.ahk to gather all caption and title text far and wide for each selected jpg image into 56_OrigTitles.txt.
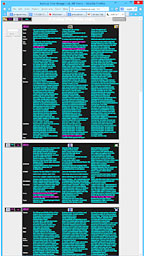
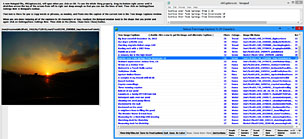

 It displays a window listing all of the images in 56_OrigTitles.txt, showing each filename preceded by the caption or the first title. It saves the accumulation into 56_SortedTitles.txt.
The user can edit each caption shown. He can double-click a row to display the actual image and to display all of the found text in a Notepad file at the top of the screen, so that he can copy and paste into the row's caption, as needed. He is also provided with 15 categories from which he must select the most appropriate one for the image.
When the user moves to another row, it replaces the old row in 56_SortedTitles.txt with the new row and category.
When the user clicks on the [Done. Clean-Save-Close] button, 54_YrToTree3_Update.ahk is run.
54_YrToTree3_Gather.ahk extracts the target info (FilePath, pathName, nameOnly) from each shortcut in C:\BU\Parse\03\Files. From this, it gets the selected jpg image path\filename. It finds the matching path in Subjects.txt from which it gets the subject folder\file (ie: Shed\Shed.htm). It finds the image filename within the subject gallery's htm file and copies out its title and caption, if any. It also gets the web page title from the image's htm page.
It then appends the FilePath, the caption, the subject htm title and the web page title to 56_OrigTitles.txt.
 54_YrToTree3_Update.ahk inserts the completed new year's image links into Tree03_JTtext.htm.
First, it copies the existing page header from Tree03_JTtext.htm to a temporary file Tree03_JTtext_header.htm.
Then it creates this year's new header and saves it to another temporary file Tree03temp.htm.
It loads 56_SortedTitles.txt, sorts it by category and saves that to a temporary file TreeSorted.txt for future analysis, if needed (like now).
It then arranges all links 3 to a row, preceded by the category if different from the previous. It appends the completed collection to Tree03temp.htm.
It saves a pair of navigational buttons to a temporary file Tree03_JTtext_years.htm so that they will precede the previous year since it had none of its own when it was at the top. Then all prior years and the footer found in Tree03_JTtext.htm are appended to Tree03_JTtext_years.htm. The footer includes the Popup javascript, a self-coded popup that appears when the user hovers over the word "Help" (found on each index page), and a tracker javascript provided by eXTReMe Tracking. Both of these javascripts must be at the bottom of the HTML code.
It then deletes the old Tree03_JTtext.htm and appends the contents of Tree03_JTtext_header.htm, Tree03temp.htm and Tree03_JTtext_years.htm to a new Tree03_JTtext.htm.
60_YrToTree4_treePics.ahk creates a thumbnail gallery of the new links, an alternative 3rd screen called " A Joshua Tree Photo Index 20YY" (Tree04_JTYYtreePics.htm) for reference by the other tree indexes and the Joshua Tree web page, with buttons pointing back to them. These are the same links that were inserted into the textual "A Joshua Tree Photo Index" with Tree03_JTtext.htm.
(The YY is the 2 digit page year.)
It copies the header <meta and javascript rows from the top of Tree03_JTtext.htm, but replaces the <title> and css with its own image oriented data, and it clears <body> since that is defined in this css.
It copies the row and 3 column html, changes height=18 to 160, and recreates each href to show a thumbnail link to the respective full screen image web page.
It adds the Popup and Tracker javascript at the bottom.
A screen capture of this page (PrtScr on your keyboard) must be pasted into Photoshop to create its 41 x 33 reference button: Tree04_buttYYpics.gif for use in other Indexes and this year's Joshua Tree page JTYY.php. It must be stored in the ../Butts/TreeButt folder with all of the other Tree buttons.
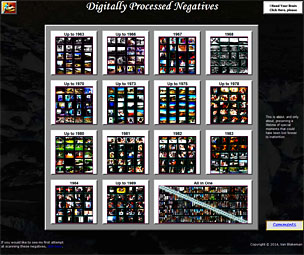 The end result of this project is to create a web page that makes all of these old negatives available to anybody that might find themselves within the photographs, or to their descendants. To me, this was a rescue operation, where had I not done this, those precious (and humdrum) moments could have been lost in a box innocently bound for the dump, or lost by fire or flood (or just too much humidity). Many, if not most, of these were not even taken by me.
In 2013, I sent 3 separate batches of old negatives to DigMyPics.com in Gilbert, AZ. They uploaded the resulting digitized images to my Google+ (aka: Picasa) account, put them onto DVDs and sent everything back, with page sized sleeves for storage in a dedicated binder. I sent another box full in 2014. I plan to send more.
Note: it helps to accurately label each pouch, envelope, ziploc, or whatever - if you can get it exactly right. However, I found that accuracy to be elusive without a magnifier of sorts and a light table and lots of spare time. It would require finding and distributing mixed batchs into separate ziplocks. Don't get any wrong because a mislabeled image can be highly misleading. I did some of that.
In the end it was not really necessary because this software allows them to be viewed and processed adequately. And then, some of the original names on the DVD are now misleading - forever (I never change original names on any image; I rename a duplicate). In the future, I will label each ziploc bag with a non-identifying label such as "Lot_001", "Lot_002", etc.. Also, a short name since the original batch name should remain at the end of the new filename. DigMyPics will append a count to that name for each negative, such as "Lot_202_001", "Lot_202_002", "Lot_202_003", etc..
This software was designed to take totally meaningless filename duplicates and convert them to names that contain pertinent information about that image. For example:
| 110_Film_12_002.jpg | became | 0100_110_Film_12_002.jpg | became | 1978-06-15_5_Cataumet_Van~Dar~_Dad-and-Darby-on-the-beach__110_Film_12_002.jpg | |
| 02_Negs_01_075.jpg | became | 1904_02_Negs_01_075.jpg | became | 1987-09-14_5_Mashnee_Bri~_Waiting-for-the-bus^-Date-guessed^__02_Negs_01_075.jpg | |
| 0436_03_1965USMCSD_016.JPG | became | 0436_03_1965USMCSD_016.JPG | became | 1965-08-00_5_Laguna_X~_Guess^-Don't-know-where-or-when.JPG |
First, each DVD was copied to a dedicated folder named with the DVD info, such as "20131029_502374_DVDJPEG1".
That folder is within my OneDrive folder (it was in Google Drive but I closed that account) so that its contents will propagate to all other devices, an automatic and very nice method of backup. I could have put them into my Dropbox cloud folder, but I use that for other things.
Then they were numbered with 4 digits and an underscore using Advanced Renamer. Since I had 3 DVDs and would need to see them all together, I initially alloted each group a range of 3000 (0010, 3010, 6010) so that they would not conflict. Then, all were copied into the NegativePics folder.
In the NegativePics folder they were viewed as thumbnails in File Explorer (formerly Windows Explorer) where they were carefully analyzed and rearranged, by changing the number, so that they ended up being as chronological as possible. The high number spacing allowed enough room to renumber an entire group of photos to an earlier date. Occasionally the entire folder would have to be renumbered again to spread them out.
I was able get this visual arrangemnt of photographs reasonably accurate on the timeline scale by referring to my spreadsheet file EventTimeline.xlsx, a carefully arranged list of events in my life (using old check registers, etc.). I also referred to a web site of dated negatives that I had manually scanned in 2010 with a Wolverine 35mm Image Converter. The results were way less then ideal but many had been loosely dated by finding the original photograph with the processing month and sometimes the year printed on the front edge or the back.
 When I was completely satisfied with the order I renumbered them again, but this time the high number could not exceed 1930_ to avoid it being interpreted as a legitimate date.
0_Negatives1.ahk offers a menu allowing the user to perform the following functions in order.
1_NameNegs.ahk displays a series of three dialog boxes, one after the other:
|
|
|||||||||
First, all image files are manually dragged from the existing \negs2 subfolders into a temporary folder named \oldPics. These include two jpgs for each pic; a full screen image and a smaller copy for the relevant gallery. The names are identical except that the latter ends with __. Then the old subfolders are moved out of the way into another temporary folder named \oldhtms, which will eventually be deleted after the revised web site is up and running.
As described above, in 1_NameNegs.ahk all of the new pics in the \NegativePics folder were dated and renamed. Copies of the old ones are then dragged from \oldPics into the \NegativePics folder so that the two large batches can merge by date. These are then visually reviewed and altered as needed, since in the context of seeing them all together, some will invariably be out of place. It is a hard and unpleasant fact that most dates will be a bit (or a lot) off unless the actual photograph was found and somebody had written in the date. The processing date printed on the photo definitely helps too, even though it could be a month or so off.
At this point, the user is given the option to establish the year count and the subfolder names. It only needs to be run once. A count for each year in the \NegativePics folder is saved to YearCounts.txt in 14 rows with a new row beginning after the file count exceeds 181, or when a special year is about to begin, such as my daughters' birth years. The cutoff of 181 was arrived at after experimentation with various cutoff numbers. So the first row ranges from "1943:4" to "1963:1". Yes, I only have 1 picture taken in 1963 and it appears to be the day before Christmas. The 14 rows will translate into 14 galleries on the web site.
A subfolder name is developed from the final year of each row, so in this case we have "\Picsto63" on up to "\Picsto98". These and the prospective gallery names are saved to Subfolders.txt. The equivelent gallery names range from "Negsto63.htm" to "Negsto98.htm".
By the time all of these pics have been reviewed and altered, many of the older batch shall have been renamed and redated. The program gets the original DVD name from the end of the filename, i.e: MF_Film_01_014, and searches the \oldPics folder for a match. If it finds a match, it renames the two matching older filenames to the new name, and moves those old pics into the dated \negs2 subfolder, such as \negs2\Picsto67, creating the subfolder the first time around. Since the old ones have already been reduced in size and Photoshopped, we don't want those to go to waste.
If a match is not found, meaning it is a new negative pic, the program runs IrfanView's downloaded i_view32.exe routine to reduce the large new image to a height of 768 pixels, with a proportionate width, as it distributes that copy to the appropriate subfolder.
The originals run from a height of about 1520 up to 5580 (BIG), depending not only on the detail of the photo and the type of film, but also on the resolution that I requested from DigMyPics.
I suspect that in some cases I may have requested a higher resolution then the film was able to provide, thereby making it excessively grainy, and more expensive. I plan to study that more thoroughly before the next order.
However, I am glad that I went for the high resolution where it could make a difference. On photos with the original resolution, the user is able to zoom into the picture to see more detail, such as in the 8th photo of Marines in a class room on the Negatives 1964 To 1966 page. They and their descendants may appreciate that. I do plan to do the same with other photographs where it might matter.
Photoshop: At this point, all of the new photos are dragged from each subfolder into PhotoShop, enhanced (Ctrl-L, Ctrl-M, Ctrl-U, Ctrl-S) and repaired as needed.
Each is saved as is, overwriting its original. It is then reduced to a height of 216 pixels, tweaked and saved with a double underscore (__) appended to the name, for use in its respective gallery.
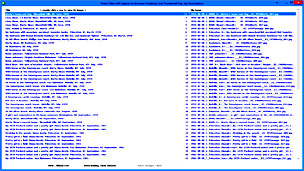 3_CreateTitles.ahk should probably be run 14 times, selecting the next subfolder each time. It derives all of the web page titles from the subfolder's filenames. Though they were already created in the Activity section of the above dialog box, this allows the user to review the derived titles together in one place and edit them as needed.
When this is run for the first time, a new _TitlesYY.txt file is created in each subfolder. (The YY is the 2 digit year found in the subfolder name [63, 66, ... 89].) Subsequent runs let the user select a subfolder and view its list of titles.
4_CreateNegPages.ahk might get run twice from the Main Menu above.
First, in each subfolder it will create the gallery and its image web pages. It runs 5_CreateNegGallery.ahk to create or recreate the gallery.
After seeing the results, the user may choose to move some images around in a gallery's HTML, and then return here to recreate the image web pages for that gallery accordingly.
Likewise for the others. The only requirement here is that he also alter some of the captions so that the software will notice the change.
This should be done anyhow. Search engines don't like finding more then one of something on a web page, so he could remove duplicate names of people that are in the captions on the same page.
He could add a Location here and there so that they will be found by the search engines. Also a description where the subject of the photo is not obvious.
5_CreateNegGallery.ahk, in the target subfolder, parses filenames and captions from the old gallery's HTML, if it exists, into _CaptionsYY.txt. It compares that to _TitlesYY.txt. If the counts are different, meaning somebody worked on it, it realigns _TitlesYY.txt accordingly and uses the old captions in the new gallery page. Otherwise for each image in the new gallery, it creates a new caption namimg the people in the image.
6_CreateAllEndPages.ahk gathers all of the links to image web pages from all subfolder galleries into one BIG all-inclusive gallery, NegsAll.htm.
It then reformats copies of all of the HTML image web pages such that they will relate to this big gallery instead of to the subfolder-centric galleries.
Gathering Photos Into A Story Of Our Ventures In And Around Joshua Tree |
Version 1.999+ |
|---|

01_CreateGallery.ahk presents a menu of the below described functions that the user can click on to create the new web site.
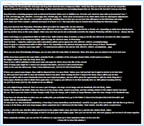
01_HowToCreateGallery.ahk tells the user to first find the desired images throughout this year's collection, enhance and save two copies of each. One will be a full screen copy that will get its own web page. The other, a smaller version to be used in the planned gallery, or an even smaller pic for inclusion in the text of an article.
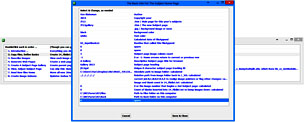

02_InputBasics1.ahk has the user provide vital information, such as the the file name of the first gallery, the title, heading, page tracking ID, possibly all of the same for a second gallery, and the number of gallery columns, and the background image (if any).
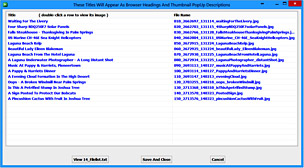
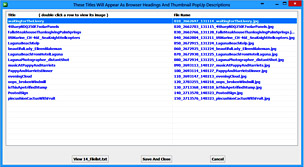
03_InputTitles.ahk extracts a potential title for each full screen web page from each filename and displays them in a listbox. The user can edit or replace each offering. When he closes out, it runs 03_ParseCaseTitles.ahk to convert all titles to title case and handle special words that need to be treated differently (eComposter, CA, RTG64XLP, Wal-Mart, USPS, 4x6x16, etc.).
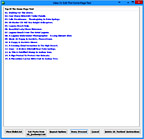
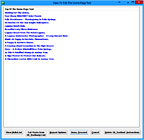
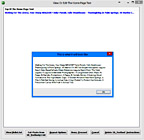
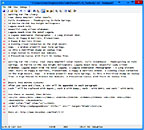
04_CreateImagePages.ahk does not provide a window of any sort. It just quickly creates a web page for each image, with arrows that will take the online user to the previous or the next images, or back to the gallery.
 |
 |
 |
 |
 |
 |
 |
 |
 |
If the user wants to enter a block of text, it will run 05_InputBodyText1.ahk to do so.
It will run 05_InputCaptions1.ahk so the user can provide captions for some or all of the small images in the gallery. 05_ParseCaseCaptions.ahk will be run for all captions to convert them to sentence case and look for special words, as described above.
 |
 |
 |
 |
 |
 |
06_AdjustGalleryPage.ahk gives the user a good mock-up of what the gallery will look like and it lets him bump images down if they will fit more logically with the next set of images. It also lets him split the gallery into 2 pages. It runs 06_BumpAndSplit.ahk to do this.
It will then re-run 05_CreateGalleryPage.ahk to recreate the actual gallery with the new changes. If he also splits a page in two, then it will re-run 04_CreateImagePages.ahk to relign the full sized image pages accordingly.
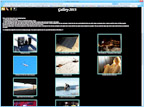
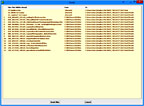 07_MoveFilesHome.ahk moves everything from the work area to the respective web site location. There, one can view the final product and open the html pages to tweak one thing or another, as needed.
08_LoadBasics.ahk and 08_SaveBasics.ahk: almost all of the above AHK routines include these routines which are transparently inserted into the calling routine as needed and where needed. ie:
#Include 08_LoadBasics.ahk
#IncludeAgain 08_LoadBasics.ahk
#Include 08_SaveBasics.ahk
A screen capture (PrtScr key on the keyboard) of each subject page must be pasted into Photoshop to create its reference thumbnail (ie: Gallery.gif, 2591509_platform.gif, etc; 108 x 95 pixels) for use in this year's Joshua Tree page JTYY.php, which will be assembled to display all of the subject thumbnails. It must be stored in the same Joshua Tree page folder; not in the ../Butts/... folder.
Likewise, after all subject pages are done, a screen capture of this year's Joshua Tree page is pasted into Photoshop to create two items: a thumbnail (20yyJTthumb.gif; 144 x 108) and a smaller button (20yyJTbutt.gif; 51 x 42). The thumbnail will go into the main Joshua Tree page (JTmenu.html) to reference the current year's Joshua Tree page. The smaller button is used in the top and bottom left corners of all subject pages to refer back to this year's Joshua Tree page.
At this point, the html of the web site's home page (the one and only index.htm) is updated to point to the current year's Joshua Tree page.
|
|

|
Copyright © 2017, Van Blakeman |
